
Sci-Fi Cave Environment Course | CG Masters
Written by Marechal Laurent - 21 march 2018
Classified in : Blender, Links - Tags : none
Site d'origine : https://cgmasters.net/free-tutorials/sci-fi-cave-environment-course/
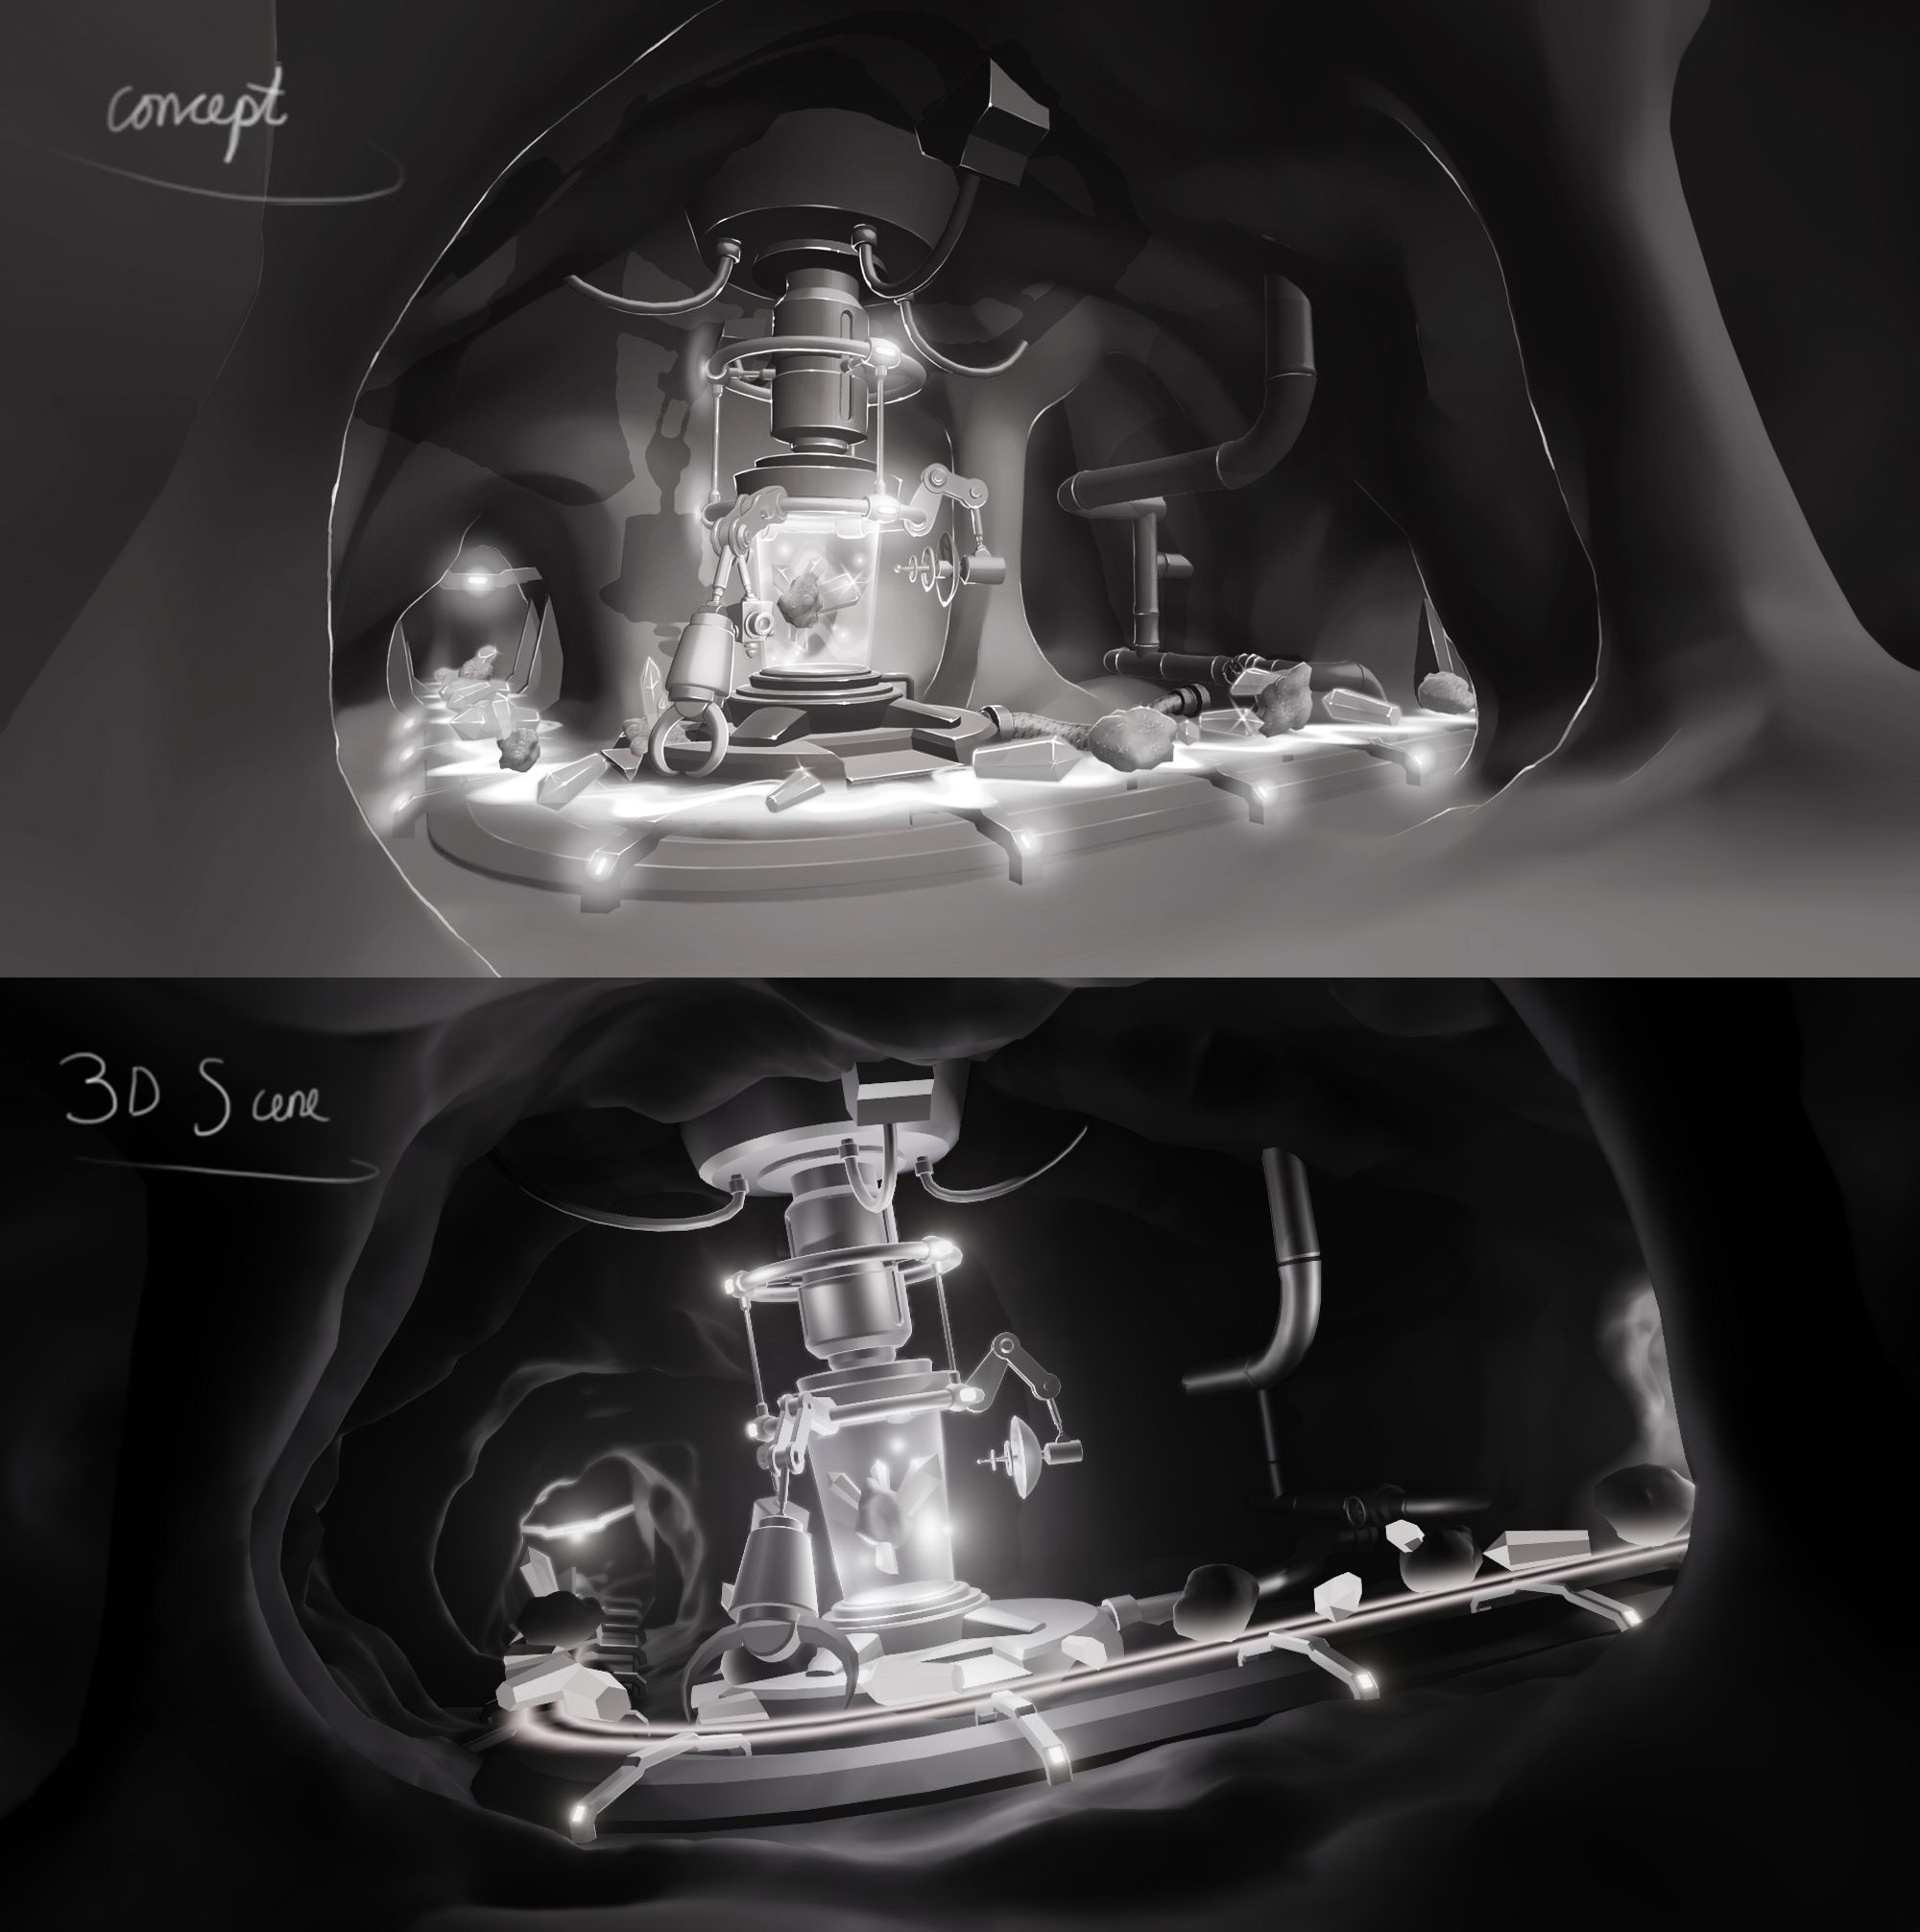
Sci-Fi Cave Environment Course | 1 - Machine Blockout
Sci-Fi Cave Environment Course | 2 - Completing the Blockout
Sci-Fi Cave Environment Course | 3 - Sculpting
Ever considered creating a full 3D environment? The skills taught in this beginner modeling course will get you up to speed in creating a scene that would render quickly for animation or interactively in a game engine running smoothly even on mobile hardware
INSTRUCTOR
Martin Turner has created environments for every games platform from PS4, PC and WiiU through to handhelds such as mobiles and the Nintendo DS to name just a few.
Martin is going to start pretty slow, and since there are many ways to do the same thing, and many places to find the same tool, he’ll be building up that knowledge quite naturally, and in many cases explaining why and when to use one location or method over another.
All we need is a copy of Blender and a basic knowledge of getting around the interface (see resources below) and then Martin will take you through the rest!
RESOURCES
Project File (right click – save as)
Daily (experimental bleeding edge) builds for Blender 2.79 & 2.8 : https://builder.blender.org/download/
01 – MACHINE BLOCKOUT
Part 1 – 3:41 Figuring out the scale from the concept
Part 2 – 8:47 Base Object
Using vertex snapping
Holding Ctrl to toggle the snapping status
I to inset, E to Extude.
Part 3 – 18:12 Forcefield Object
P to separate a selected face to create a new object from it.
Change the origin (or use the toolshelf)
Part 4 – 22:06 Forcefield Cap
Ctrl Tab to switch between face/edge/vert select mode.
Alt E for a more complete extrude menu e.g. along vertex normals
Part 5 – 26:08 Central Column
Ctrl R to cut a loop across a ring of edges.
Page up or middle mouse to add more loops with Ctrl R.
Part 6 – 35:37 Top Objects
Decluttering the scene using M to move objects between Layers, the array modifier, Ctrl P to parent and some tips about changing values on multiple objects at the same time.
Using the Array modifier, how to change values on more than one object at the same time.
Part 7 – 45:09 Ring Section
F6, shrink fatten tool alt S, Using Median snapping instead of closest
Part 8 – 52:37 Machine Arm
Using the 3d cursor as a pivot point.
Bridging Edge Loops. Using Ctrl M to mirror, showing the problem with backface culling, fixing with Ctrl N. Solving problems with overlapping duplicate geometry by merging with Remove doubles
Part 9 – 1:11:08 Machine Arm Attachment.
Applying the transformations. Basic posing. Rotation snapping and just for fun 😉 calculating exactly where to place things with a little arithmetic.
END.
02 – COMPLETING THE BLOCKOUT
Part 1 – 01:25 Breaking down the concept.
Alt P to clear parent. Shift S > Selection to Cursor with Offset.
Part 2 – 03:37 The conveyor belt – Straight section.
Part 3 – 08:51 Curved section.
The spin tool.
Part 4 – 11:28 Conveyor Belt Support Bracket
Shrink/Fatten
Ctrl B for Bevel
Alt E – Extrude (Region Vertex Normals)
Part 5 – 16:38 Large/Small Pipes – Basic Kit Blockout.
Part 6 – 28:45 Laying out the Pipes
Apply rotation
Part 7 – 39:17 Cavern Blockout
Add cube, duplicate and place as the main cave vertical pillars
Part 8 41:26 Cavern Floor
Add plane, extend for the tunnels.
Part 9 – 44:09 Cavern Walls.
Extrude, Flip Normals
Part 10 – 46:48 Combining the Cavern parts together.
Join, Remesh modifier.
END – 49:30 In the next chapter
03 – SCULPTING
Part 1 – 02:23 Main Cave – Rough Pass
Turn off symmetry, Beware backfaces, Standard sculpt draw brush, hold Shift for the smooth brush
Part 2- 09:02 Cave PIllars Rough Pass
Masking tools
11:41 Repeating the process for the remaining pillars.
13:40 Matcaps.
14:46 Dynamic Topology Concept Explained.
17:41 Applying dynamic topology sculpting to the cavern.
Constant detail, Detail floodfill.
Part 3 – 21:06 Cavern Ceiling Ridge Shapes
00:00 Cavern Ceiling Ridge Shapes
22:17 Masking the Floor (with B)
23:52 – toggling between sculpting add/subtract with ‘Ctrl’
Part 4 – 28:14 Shaping the Pillars
28:14 – Tilting the Pillars
29:19 Proportional editing. (Shortcut O) brush size with page up or down.
32:16 alt H to unhide objects
32:54 alt H to unhide masked geometry, alt M ot clear mask
33:12 Background Column
33:57 Inflate brush
36:47 Grab brush
Part 5 – 37:42 Cave Entrances
37:42 First cave entrance
42:05 correcting the tunnel
42:59 Second Cave Entrance
Part 6 – 45:35 Pillars
45:35 Pillar Base Left Hand Side
50:05 Pillar Base Right Hand Side
51:23 Notes on a tablet.
52:58 Extra Corner Cave Wall & Moving A Pillar
55:21 Adjusting Pillar Position with proportional editing.
59:42 Pillar Base Rear Side
Part 7 – 1:01:14 CAVE FLOOR AND WALLS
1:01:14 Cave Floor
1:04:57 Cave Walls
1:07:11 Expanding out the front wall
1:08:54 freehand selection with ctrl Left click.
1:09:20 Proportional editing the wall move.
1:10:05 Tip – Fixing the stretched polygons with a dyntopo (strength 0)
Part 8 – 1:12:22 Making General Tweaks
1:12:22 Bringing in the left side wall
1:14:07 Freehand selection with ctrl Left click.
1:14:23 Box deselect with B > Middle click drag.
1:16:39 Back wall space shortening between entrance and machine
1:17:59 Softening foreground ceiling spikes and angular parts.
1:19:04 Entrance tidy up after previous move with the Grab brush.
1:20:41 Left hand wall tweaks
1:23:33 Right hand wall tweaks
1:26:59 END
NEXT CHAPTERS
<coming soon!>
SHARE ON THE SOCIALS
https://www.facebook.com/cgmasters/
https://www.facebook.com/AidyBurrows3D/
Comments are closed.